

Memories in the Garden
I vividly remember the early spring mornings I spent with my grandmother, kneeling beside the moist earth of her backyard garden. She would wear her old sunhat, the one frayed at the edges, and carry a small wicker basket filled with seeds. “We plant peas early,” she would say with a knowing smile, “before the soil loses its coolness.” I never quite understood why until I grew older and found myself doing the same — gently pressing pea seeds into the soil, feeling a strong connection to her through every planting. My neighbor, Mrs. Rivera, who came from Mexico, often shared her tips, too. She told me about snap peas and how her family used them in fresh salads and stir-fries. Together, these memories have shaped the careful, methodical way I approach planting peas today.
Table of Contents
Understanding the Basics of Planting Peas
What Makes Peas Unique Among Garden Vegetables
Peas are unique in the home garden for several reasons. As legume family members, they can fix nitrogen in the soil through a symbiotic relationship with certain bacteria. This characteristic not only benefits the peas themselves but also enriches the soil for future crops. Peas grow best in cool weather and flourish during the mild temperatures of early spring and autumn. They are among the first vegetables that gardeners can sow outdoors, often when other plants would still struggle with lingering cold.
Additionally, peas offer nutritional value that is difficult to match. High in protein, fiber, and essential vitamins like Vitamin K and C, they provide both a culinary and health boost to any diet. Their versatility is another strength — peas can be eaten fresh, shelled, or dried for later use. Understanding these advantages is crucial before venturing into the practical steps of growing peas, which demands attention to timing, soil quality, and care techniques.
Reflection: Have you ever thought about how certain plants, like peas, improve the very soil they grow in? It is one of nature’s small miracles that we often overlook.
And to learn more about organic garden soil, click here.

Various Pea Varieties to Cultivate: Garden Peas, Snap Peas, and Snow Peas
When planning your pea planting guide, it is essential to understand the three main types of peas available: garden peas (also known as English peas), snap peas, and snow peas.
- Garden Peas: These require shelling before eating, as the pod is tough and inedible. They are sweet and perfect for freezing or cooking.
- Snap Peas: With a crisp, edible pod, snap peas are delightful raw or lightly sautéed. They combine the sweetness of garden peas with the convenience of snow peas.
- Snow Peas: Recognizable by their flat pods, snow peas are a staple in Asian cuisine. They are typically harvested while the seeds are still small, making them tender and flavorful.
Each type offers different benefits, so it is wise to consider how you plan to use your harvest before choosing seeds. Reflecting on my grandmother’s advice, I often plant a combination to ensure a variety of uses in my kitchen throughout the season.
When to Plant Peas for Best Results
What Is the Best Month to Plant Peas?
Timing is everything in gardening, and nowhere is this more evident than when planting peas. The best month for sowing peas typically falls between late February and early April, depending on your climate zone. In regions where the ground freezes deeply, it is advisable to wait until the soil can be worked without excessive moisture. Peas can withstand frost and grow well in cooler climates.
Where I live, March is the golden window. The soil is usually around 45°F to 50°F, a perfect range for pea seed germination. Planting too late results in heat stress, leading to poor flowering and smaller pods. Understanding this seasonal rhythm is crucial for maximizing your pea harvest and ensuring a healthy crop.
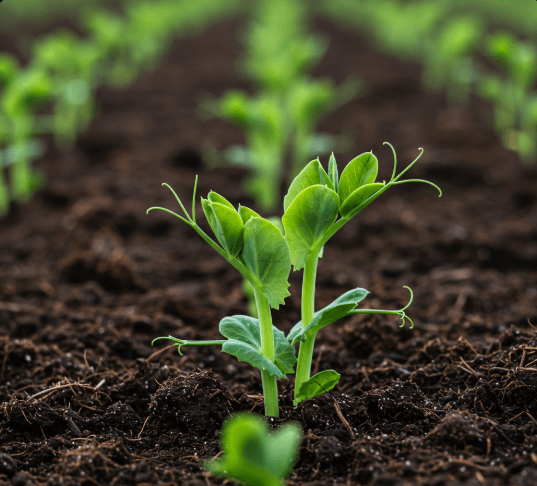
How Soil Temperature Affects Pea Germination
Soil temperature is a decisive factor in pea germination rates. Pea seeds can germinate in soils as cool as 40°F, but optimal germination occurs between 50°F and 70°F. When the soil is too cold, seeds germinate slowly and inconsistently. If it is too warm, especially above 75°F, seeds may rot or fail to sprout altogether.
To accurately gauge soil temperature, I use a simple soil thermometer inserted a few inches deep. If the soil remains consistently above 45°F for several days, I know it is time to begin planting peas. Early planning and monitoring ensure that the seeds establish quickly, growing into strong, healthy plants capable of withstanding early spring’s unpredictable weather.
Choosing the Right Location and Soil Preparation
Best Soil Conditions and pH Levels for Growing Peas
Selecting the correct soil is paramount when embarking on your pea planting guide. Peas thrive in loamy, well-drained soil that is high in organic content. A sandy loam is ideal, providing a good balance between moisture retention and aeration. Waterlogged soils can lead to root rot, one of the most common issues peas face.
In terms of pH, peas thrive in slightly acidic to neutral soil, ideally between 6.0 and 7.5. I often amend my garden beds with composted manure a few weeks before planting to enhance soil fertility without making it overly rich in nitrogen, which can promote excessive vine growth at the expense of pod production.
How to Prepare Your Garden Bed for Pea Planting
Proper bed preparation is the foundation for a successful pea crop. First, I clear the area of any weeds or debris that could compete with the young seedlings. Then, using a broadfork or spade, I loosen the soil to a depth of 8 to 10 inches to encourage robust root development.
Before sowing, I also mix in organic compost and a balanced fertilizer if a soil test indicates deficiencies. Raised beds or mounded rows work exceptionally well for peas, especially in regions prone to heavy spring rains, as they prevent water pooling around the roots. Following these steps not only optimizes conditions for growing peas but also ensures that the plants get off to a strong and healthy start.
How to Plant Peas the Right Way
What Is the Best Way to Plant Peas?
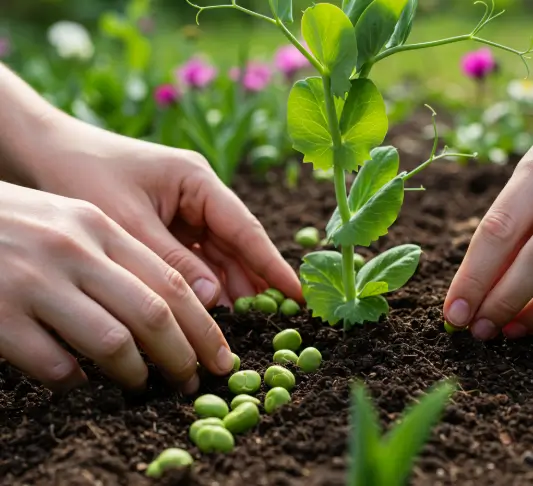
When I first started planting peas independently, I followed the traditional method my grandmother taught me: direct sowing into the ground. Peas do not transplant well because they have delicate roots that dislike disturbance. Therefore, the best way to plant peas is by sowing them directly into prepared garden beds once the soil temperature is suitable.
To prepare the seeds, I often soak them overnight in lukewarm water. This softens the seed coat and promotes faster germination, particularly if the soil is still cooler. After soaking, I sow the seeds about 1 to 1.5 inches deep. Planting deeper can prevent drying out in early spring breezes.
The seeds should be covered with loose soil, gently patted down, and watered thoroughly but carefully to avoid displacement. Planting this way allows for strong root establishment, providing a better chance for healthy plants and a fruitful harvest.
Proper Spacing, Depth, and Seeding Techniques for Peas
Spacing is critical when following a pea planting guide. Pea seeds should be spaced about 2 inches apart within rows that are separated by 18 to 24 inches. This allows adequate air circulation, reducing the risk of diseases like powdery mildew.
When I plant, I often create shallow furrows using the handle of a hoe or a stick. I drop the seeds in at intervals, cover them lightly with soil, and mist the row gently with water. A light mulch, such as straw, can help maintain soil moisture and temperature, giving the peas the stable environment they need to flourish.
Supporting Your Pea Plants: Do Peas Need a Trellis?
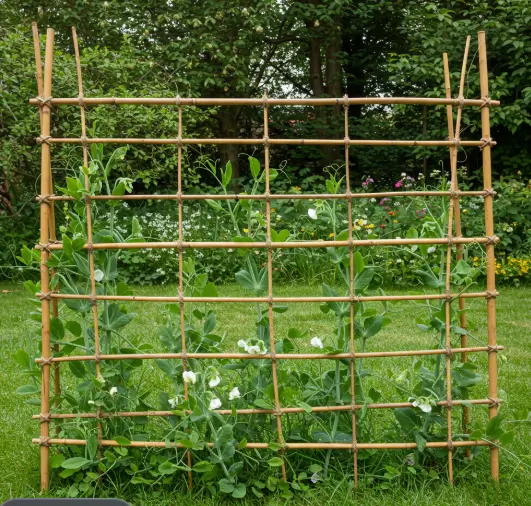
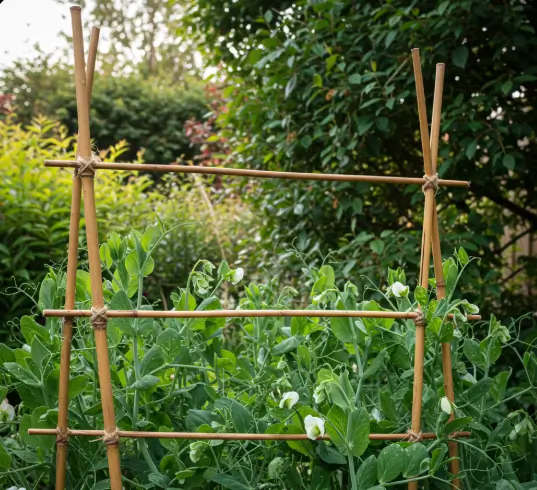
When and Why Peas Need a Trellis to Climb
One of the first gardening challenges I faced was seeing my vigorous pea vines sprawling across the ground, attracting pests and mildew. That was when Mrs. Rivera advised me: “Give your peas a ladder, and they will reward you.” Indeed, many types of peas, especially tall varieties, benefit greatly from support.
Trellising helps peas grow upward, keeping foliage dry and increasing exposure to sunlight. This method also makes harvesting easier and prevents pods from rotting on damp soil. In my experience, providing a trellis immediately after sowing ensures that tender vines latch on early, promoting healthier plants.
Easy DIY Trellis Ideas for Pea Plants
Building a trellis does not have to be complicated or expensive. Some easy ideas include:
- String trellis: Tie garden twine between two stakes at intervals.
- Branch trellis: Use fallen branches arranged vertically and tied together for a rustic look.
- Chicken wire fencing: Stretch fencing between posts for sturdy support.
When growing peas, I often recycle old bamboo poles and create a simple teepee structure, which not only serves its purpose but adds charming vertical interest to the garden.
And for more about trellis, click here to learn more

Companion Planting: What Not to Plant Next to Peas
Plants to Avoid Growing Near Peas
Peas are generally cooperative neighbors in the garden, but there are a few plants that can hinder their growth. It is best to avoid planting:
- Onions
- Garlic
- Shallots
- Chives
These all belong to the allium family and can inhibit the growth of peas due to their natural anti-bacterial compounds that disrupt the soil ecosystem necessary for pea nitrogen fixation.
Another caution from my grandmother was against planting peas near potatoes, as both crops are susceptible to similar soil-borne diseases, which can lead to weakened plants.
Best Companion Plants to Boost Pea Growth
Good companions for peas include:
- Carrots – They help loosen the soil.
- Radishes – They mature quickly and can be harvested before peas need more space.
- Spinach and Lettuce – These grow well in the cool season alongside peas.
In my garden, I always plant radishes between my rows of peas. They sprout fast, break up the soil, and add diversity to the early spring harvest. Practicing companion planting has significantly improved the success of my organic pea gardening efforts.
Caring for Pea Plants After Planting
Watering, Mulching, and Feeding Young Pea Plants
Consistent watering is essential for peas, particularly during flowering and pod development. I water deeply once or twice a week, keeping the soil consistently moist without allowing it to become waterlogged. A drip irrigation system or soaker hose works wonderfully to keep moisture even without splashing the foliage.
Mulching around the plants with straw or shredded leaves conserves moisture and keeps the roots cool, which is critical when growing peas in unpredictable spring weather. I refrain from heavy feeding; peas fix their nitrogen. However, an early application of balanced organic fertilizer or a side-dressing of compost enhances growth.
How to Keep Pea Plants Healthy and Pest-Free
Vigilance is key when caring for pea plants. Common pests like aphids can be discouraged with natural methods such as spraying plants with a strong jet of water or introducing beneficial insects like ladybugs.
Crop rotation also plays a role in maintaining pea health. By changing planting spots each season, I reduce the buildup of soil-borne diseases like fusarium wilt. Following these simple but effective practices ensures that my pea plant care routine results in strong, pest-resistant plants year after year.
Harvesting Peas at the Right Time
Signs Your Peas Are Ready to Harvest
Knowing exactly when to harvest is part science and part intuition. Peas should be plump but not over-mature. In the case of snap peas, the pods should be full but still crisp. Snow peas should be picked when the pods are flat but tender, and garden peas when the pods are rounded and bright green.
I check my plants every morning once flowering begins. It is amazing how quickly peas can ripen overnight!
How to Harvest Peas Without Damaging the Plants
To harvest, I use two hands — one to hold the vine and the other to gently pull the pod. This prevents accidentally uprooting the entire plant, which can happen because pea vines are delicate. Regular picking encourages further production, extends the harvest window, and improves the overall yield of my pea planting guide.
And there is a full guide for 10 vegetables, so click here to learn more
Common Problems When Planting Peas
Troubleshooting Poor Germination or Stunted Growth
Poor germination often results from cold, overly wet soil. If the seeds rot instead of sprouting, re-sow in slightly drier conditions. Stunted growth can also occur due to nutrient-poor soil or competition with aggressive weeds.
By testing soil conditions beforehand and ensuring thorough bed preparation, I have significantly reduced germination issues in my garden.
Managing Common Pea Pests and Diseases
The most frequent threats to growing peas include:
- Aphids
- Powdery mildew
- Root rot
Employing organic pest management, practicing good spacing for airflow, and avoiding overwatering have been key strategies in my garden. Prevention, in this case, truly is worth more than any cure.

FAQs About Planting Peas
What is the best way to plant peas?
The best way to plant peas is by direct sowing into well-prepared soil once it warms to at least 45°F, using proper spacing and ensuring consistent moisture without waterlogging.
Do peas need a trellis to climb?
Most varieties of peas benefit from a trellis, which promotes healthier plants, higher yields, and easier harvesting.
What is the best month to plant peas?
Depending on your location, the best month to plant peas is usually March or early April, when the soil is workable and the risk of severe frost has diminished.
What should not be planted next to peas?
To prevent growth inhibition and disease spread, avoid planting peas near members of the allium family, like onions and garlic, as well as near potatoes.