Table of Contents
Understanding the Basics of DIY Flower Pots
What is a DIY Flower Pot?
DIY flower pots are handcrafted containers used for growing plants, offering a personalized and cost-effective alternative to store-bought options. Creating your own flower pots allows for customization in size, shape, and design while also promoting sustainability through upcycling materials. Whether crafted from clay, cement, wood, or recycled household items, DIY pots can enhance any indoor or outdoor garden space.
The benefits of making DIY flower pots include affordability, environmental friendliness, and creative expression. Unlike mass-produced pots, DIY versions can be tailored to match home decor or specific plant needs. Furthermore, engaging in DIY projects fosters a sense of accomplishment and encourages sustainable gardening practices.

Materials Commonly Used in DIY Flower Pots
There are several materials suitable for making DIY flower pots, each with its benefits:
- Clay: Provides a classic, earthy look and is highly porous, which benefits plant roots.
- Cement: Offers durability and a modern aesthetic, ideal for both indoor and outdoor use.
- Wood: A natural and rustic option, wooden pots can be treated to withstand moisture.
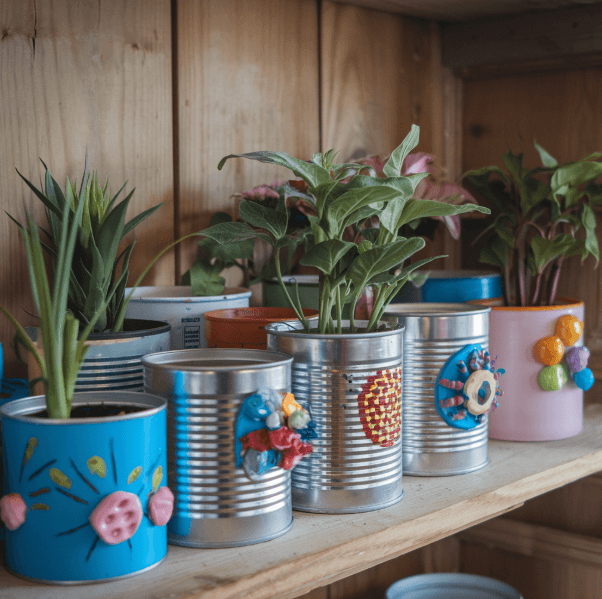
- Recycled materials: Upcycling items like plastic bottles, tin cans, or old ceramic bowls reduces waste and creates unique planters.
Choosing the right material depends on the intended use, plant type, and personal preference. For instance, clay pots allow for excellent airflow, while cement and wood offer durability and aesthetic flexibility. Recycled materials are an excellent choice for those looking to minimize their environmental footprint while still achieving a stylish and functional design.
Preparing for Your DIY Flower Pot Project
Gathering Necessary Tools and Materials
Before starting your DIY flower pot project, it is essential to gather the necessary tools and materials. Depending on the type of pot you intend to create, you may need:
- For clay pots: Clay, pottery wheel or rolling pin, water, carving tools, kiln or oven.
- For cement pots: Cement mix, water, molds (such as plastic containers), sandpaper, and paint (optional).
- For wooden planters: Wood planks, nails or screws, saw, drill, waterproof sealant.
- For upcycled planters: Scissors, paint, glue, or adhesive for decorations.
Having the right tools ensures a smooth and efficient crafting process. It is also helpful to prepare your workspace by laying down protective sheets and ensuring good ventilation, particularly when working with cement or paint.
Safety Precautions and Best Practices
Safety is a crucial aspect of DIY projects. When working with clay or cement, it is advisable to wear gloves to protect your hands from drying out. If using a kiln or oven, follow temperature guidelines to prevent cracking. For cement, work in a well-ventilated area and wear a mask to avoid inhaling fine particles.
When crafting wooden planters, always use proper safety gear, including gloves and protective eyewear, to avoid splinters and sawdust inhalation. When upcycling plastic or metal containers, ensure sharp edges are smoothed down to prevent injury.
Following these safety precautions not only ensures a successful project but also promotes an enjoyable and injury-free crafting experience.
Crafting Clay Flower Pots
Selecting the Right Type of Clay
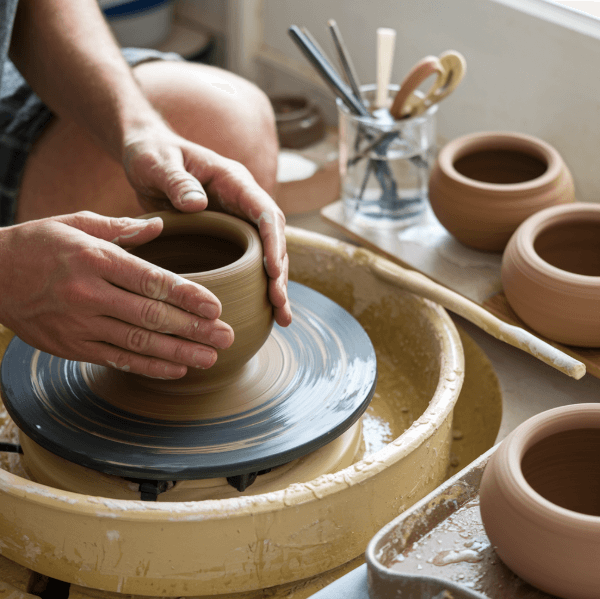
Clay flower pots are an excellent choice for their porous nature and classic look. There are three primary types of clay used in pottery:
- Earthenware: The most common type, easily moldable but requires sealing for water retention.
- Stoneware: A more durable option, capable of withstanding varying weather conditions.
- Porcelain: Less common for DIY but provides a sleek and refined finish.
Selecting the appropriate clay depends on personal preference and intended use. For beginners, earthenware is the most accessible and forgiving option.
Step-by-Step Guide to Making a Clay Flower Pot
- Prepare the clay: Knead it to remove air bubbles and improve flexibility.
- Shape the pot: Use a pottery wheel or hand-building techniques such as coil or slab construction.
- Smooth the surface: Wet your hands to shape and refine the pot’s form.
- Drying: Allow the pot to air-dry for at least 24 hours before firing.
- Firing: Place the pot in a kiln or oven at the recommended temperature for your clay type.
- Sealing: Apply a glaze or sealant to enhance durability and water retention.
Decorating and Glazing Your Clay Pot
Once the pot is fired, it can be decorated using paints, glazes, or natural finishes. Adding patterns, and textures, or even embedding small stones can personalize the design. For outdoor use, waterproof sealants help protect the pot from moisture damage.
Creating Cement Flower Pots
Advantages of Cement Flower Pots
Cement flower pots are durable, weather-resistant, and have a contemporary appeal. Unlike clay, cement does not crack easily and can be molded into various shapes and sizes. These pots are also highly customizable, allowing for painted designs, embedded patterns, and even mixed textures.

Step-by-Step Guide to Making a Cement Flower Pot
- Prepare the mold: Use plastic containers or silicone molds for shaping.
- Mix cement: Combine cement with water until achieving a thick consistency.
- Pour into mold: Fill the mold evenly and tap to remove air bubbles.
- Curing: Let the pot sit for 24–48 hours to set properly.
- Sanding and finishing: Smooth rough edges with sandpaper.
- Painting and sealing: Use waterproof paint to decorate and protect.
Painting and Sealing Your Cement Pot
Cement pots can be painted with acrylic or outdoor paint. Sealing the pot with a waterproof sealant extends its longevity, especially for outdoor use.
Frequently Asked Questions (FAQs)
How to make a flower pot step by step?
The process varies based on the material. Generally, it involves shaping the material, allowing it to dry or cure, and finishing it with paint or sealant. For clay, molding and firing are essential. Cement requires mixing and setting, while wood needs cutting and assembling.
How to make a pot at home?
Making a pot at home can be as simple as repurposing household items or as complex as molding clay or cement. Using plastic containers, tin cans, or old ceramic bowls are great beginner-friendly options. Adding drainage holes and proper soil ensures healthy plant growth.
How do you make a flower pot at home?
Crafting a flower pot at home involves choosing the right materials, preparing the structure, and ensuring proper drainage. Clay, cement, and wood offer sturdy options, while upcycled materials like plastic bottles provide sustainable alternatives. Personalizing with paint or decorative elements adds a unique touch.
What can I use if I don’t have plant pots?
Alternative options include using tin cans, old bowls, baskets lined with plastic, or even fabric grow bags. Recycled materials such as milk jugs or shoe organizers can also serve as creative and budget-friendly planters, ensuring a sustainable and eco-friendly approach to gardening.


1 thought on “The Easiest Way to Make DIY Flower Pots: A Comprehensive Guide”